Here is a step by step guide to Microsoft Outlook 2003 setup. These are the details you need before you can setup the email client:
- POP3 or receiving server: mail.yourdomain.com (where yourdomain.com is your domain name)
- SMTP or sending server: Your ISPs sending (SMTP) server. You need to get this information from your Internet Service Provider. Alternatively you can use mail.yourdomain.com (where yourdomain.com is your domain name) but often the communication to third party SMTP servers will be blocked by your ISP in order to cut the amount of SPAM going out of their network.
- Email address: you@yourdomain.com
- Username: you@yourdomain.com
- Password: password you have chosen when that account was created.
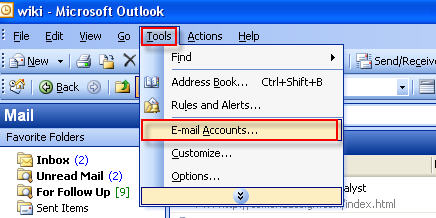
To setup a new account you need to click on Tools -> E-mail Accounts.
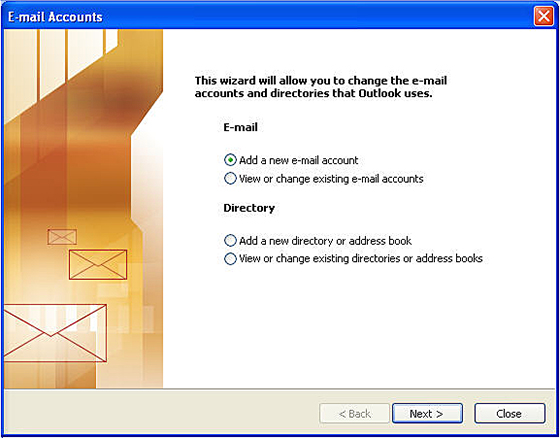
You then need to choose Add a new email account and click Next.
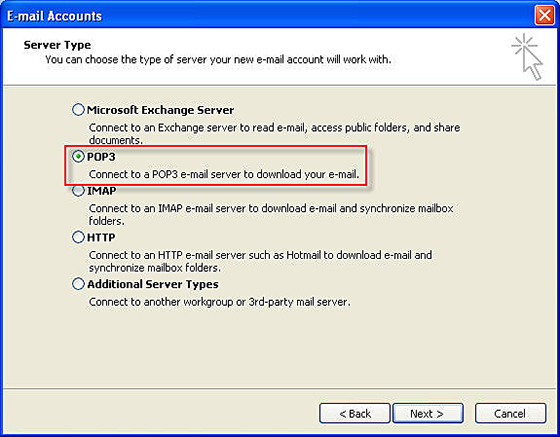
You then need to select POP3 and click Next. Please note that you can not use any other protocol in the list.
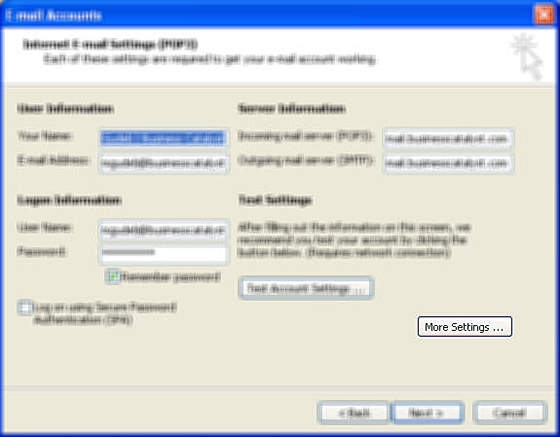
In the next step you need to fill in the account information. As per screenshot below, here are the things you need to fill in this screen with:
- Your Name: you need to enter you name here. This is the name that will be displayed on the receiving end.
- Email address: This is the email address you have your POP enabled for. It is same as your Admin username.
- Username: This is your Admin username and it is same as your email address.
- Password: This is the password you have chosen when you first created this account.
- Incoming mail server (POP3): This will always be mail.yourdomainname.com where yourdomainname.com is the doamin name of your business which you have added to the site in Admin -> Manage Domain Name and for which you have enabled POP.
- SMTP or sending server: It's the same as POP3 server, so you need to use mail.yourdomain.com. Often the communication to third party SMTP servers will be blocked by your ISP in order to cut the amount of SPAM going out of their network so you may need to use your ISPs sending (SMTP) server here. You need to get this information from your Internet Service Provider.
In the next step click More Settings and make sure that you have the correct settings in this section.
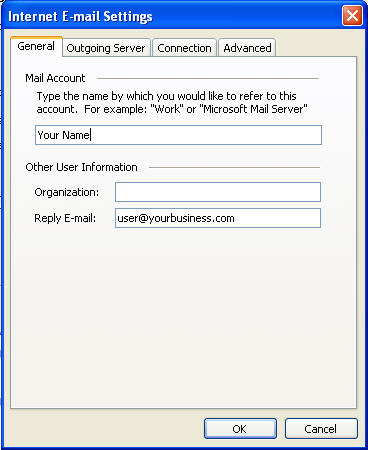
In General tab you need set your name and a reply email address. This is usually the same as your email address.
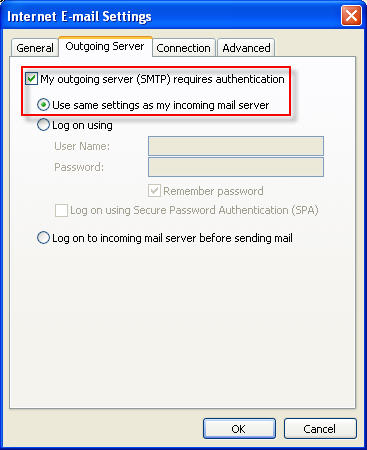
Under Outgoing Server tab you need to tick "My outgoing server (SMTP) requires authentication" if you are using our server for sending. If you are using your ISP's SMTP server probably will not need this option.
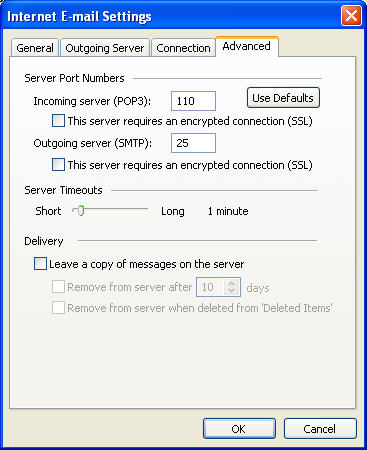
Finally, under Advanced tab you need to make sure that the port numbers are 110 and 25 and that nothing is ticked. You then need to click OK and Finish.
Now, when you click on Send/Receive you should be able to send and receive mail.
*** For step-by-step video instructions, click here!

